
Factors affecting photosynthesis

Author(s):
Summary:
‘F.6.4.4. With the acquisition of ‘solid fuels, liquid fuels, gas fuels, renewable and non-renewable energy resources’, the aim of this lesson plan is to increase the awareness levels of secondary school students on renewable energy resources. to explain that these resources are of great importance in terms of effective and widespread use in the future and to reach the level of producing natural resources as an alternative to non-renewable energy resources. In line with these goals, with the help of a mechanism that we have prepared by using robotic coding in this lesson plan, it is to provide the answer to the question of where we can produce and use the electrical energy, which is indispensable in our daily life.
| Lesson plan summary | |
| Subject | Green Chemistry / Green Biotechnology / Green Engineering and Robotics |
| Topic | Renewable and non-renewable energy resources |
| Age of students | Secondary 10-13 |
| Preparation time | 15 Minutes |
| Teaching time | 2*40 Minutes |
| Online teaching material (links for online material) | https://youtu.be/1hFuy43S_Js |
| Offline teaching material |
Aim of the lesson
By the end of this lesson students will:
1) distinguish between renewable and non-renewable energy sources.
2) Know the importance of renewable and non-renewable energy sources.
3) Understand that science and technology have a positive role in the effective utilization of natural resources by people and society.
4) Describe how technological products and systems can be used to protect natural resources, living beings and habitats.
· Trends
STE(A)M Learning /expository teaching method / question and answer teaching method/project-based learning
Activities
Describe here in detail all the activities during the lesson and the time they require. Remember, that your lesson plan needs to revolve around the topic of green engineering and robotics.
| Name of activity | Procedure | Time |
| Engage-1 | After asking the students how they are, the teacher explains that, he aims to look at nature and our environment differently at the end of the lesson. An animation is watched by teacher.https://youtu.be/1hFuy43S_Jshttps://www.youtube.com/watch?v=thdKsEA-lloThe teacher asks the students to say the energy sources that draw their attention in this animation they watched. | x min |
| Explore-1 | 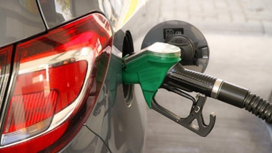 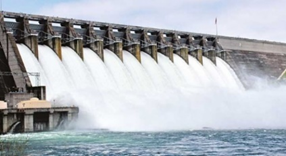 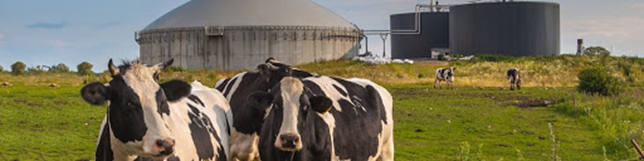  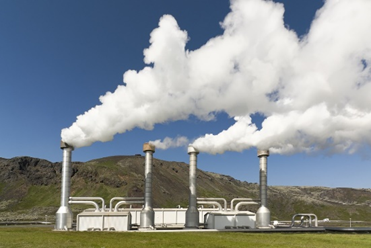    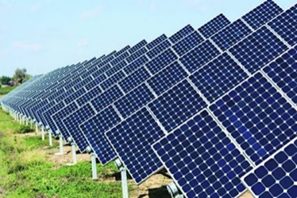   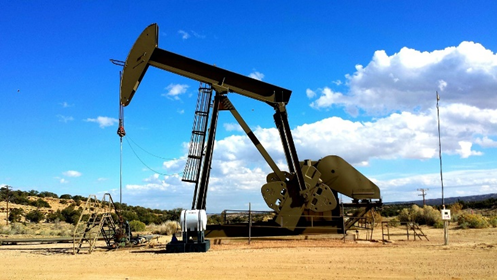 At this stage, the teacher hangs on a lot of visuals about the renewable and non-renewable energy sources on the board. s/he writes a letter under the each visual. S/he asks to the students ‘Which of these energy sources can be reproducible after use? Which of them will be consumed after use?’ Then, students are asked to write the letters representing the visuals they think are renewable and non-renewable energy sources in separate boxes. | 5 min |
| Explain-1 | Heat Energy Turns into Light Energy Material List to be used:1. Arduino Robotic Coding Board2.1x 6V Solar Panel3. 1 Powerbank4.1pcs 5V Relay5. 1 pcs LDR Sensor6. 1 Piece 7W Led Bulb7. 1 USB Charging Cable8. 1 Breadboard9. Jumper Cable10. 1 Piece 10k Resistor11. Mblock IDE program    Arduino Uno 2. 6V Solar Panel 3. Powerbank  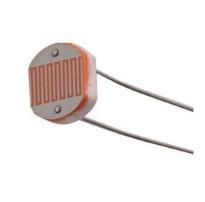  4. 5v relay 5. LDR sensor 6. Led bulb 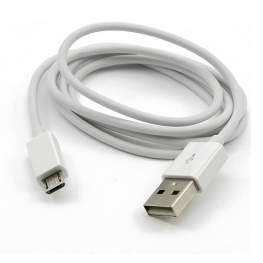  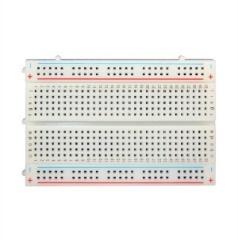 7. USB charging Cable 8. Breadboard 9. Connection cables  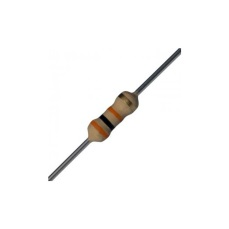 10. 10k Resitor 11. Mblock IDE The Data Obtained:In our experiment, electricity will be generated from the solar panel and a powerbank will be stored. The stored energy will be used to illuminate the school during hours of low light intensity. LDR sensor and Arduino Uno programming board will be used to measure light intensity. Data will not be obtained as a result of the experiment, only observation will be made.Expectation:Solar panels are materials that generate electricity thanks to solar energy. It is planned to enlighten the school environment in the evening with renewable energy. Our expectation in this experiment is to discover the usage areas of renewable energy in our daily life. | 5 min |
| Elaborate-1 | Conversion of Heat Energy to Light Energy Goal:In this project, our aim is to explain how the renewable energy sources, which are freely circulating in nature, are transformed into electrical energy and how they can be used in case of need. Design of Experiment Setup:The electrical outputs of the solar cell, which converts the energy from the sun into electrical energy, will be connected to the power input of the powerbank. Then, the voltage will be sent to both the Arduino and the led bulb through the relay from the power outlet of the powerbank. Thus, the Arduino Robotic Control Card, which is our control unit, will also be fed from edible energy. There will be one LDR (photoresist) in the environment and it will measure the light intensity of there. The Arduino Robotic Coding Card will be used both to interpret the value from the LDR and to control the role card. Design of Experiment Setup: In this experiment, we will use the powerbank, which we fill with sunlight during the day, to meet the lighting needs of the model school in the evening. The experimental setup we have designed above will be designed.● After the design is done, when daylight is abundant, light will be transformed into electrical energy through solar cells.● Energy that turns into electrical energy will come to the powerbank and be stored by means of cables.● Through the photoresistor that measures the ambient light, Arduino will measure the ambient light intensity and trigger the role if it interprets that it is not bright.● The triggered relay will connect the two ends to which the LED bulb is connected and close the electric circuit and ensure that the LED Bulb is fed from Powerbank.● In this way, in the evenings the school’s light needs will be met from this energy which is converted from the renewable solar lights in the daytime and stored in the powerbank. Necessary materials: 1 x Arduino Uno Robotic Coding Board1 x Breadboard1 x 6V Solar Panel1 x 5V Relay1 x Photoresistor1 x Led Bulb8 x Jumper wires1 x USB cable1 x Micro USB cable1 x 10K resistor Introduction of Photoresist and Pin Connections:Photoresist depends on the intensity of the light falling on it. It is a circuit element with varying resistance.Its resistance change is inversely proportional to the amount of light falling on it. When resistance is measured with Arduino, the amount of light falling on it is also determined. There are 2 pin outputs, these are Vcc, GND.When it is connected to Arduino’s Analog input, it takes 0 – 1024 value depending on the light intensity falling on it. Functions of pin outputs: Vcc: to Arduino’s Analog input terminals pin to be connectedGND: To Arduino’s GND terminals pin to be connected 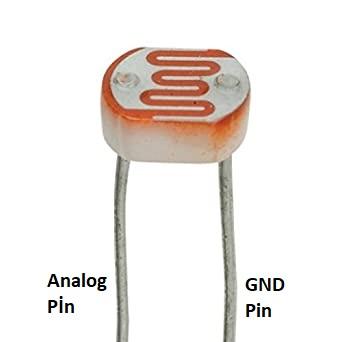 Introduction of Photoresist and Pin Connections:The relay is the circuit element that serves to close the circuits that require high power by using low power. When we digitally give the relay 1 from the Arduino Robotic Coding Card, it closes the circuit and provides energy to the place to be transmitted. When 0 is given to the relay from Arduino, the circuit opens and the energy is not applied, the device at the end of the relay does not work. In this project, the LED Bulb will be turned on and off using this method. To define the functions of pin outputs: 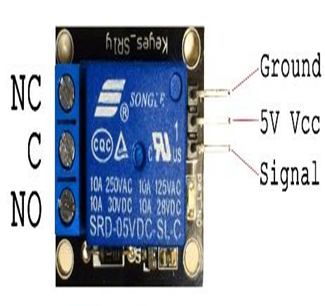 Vcc: the pin which will be connected to Arduino’s Analog input terminals GND: the pin which will be connected to the Arduino’s GND terminalsSignal: ıt will be connected to the Arduino’s digital output pin Vcc: the pin which will be connected to Arduino’s Analog input terminals GND: the pin which will be connected to the Arduino’s GND terminalsSignal: ıt will be connected to the Arduino’s digital output pinC: the pin one end of the cable will be connected to join the cables NO: the pin the other end of the cable to will be connected. Here, C and NO pins will be closed or opened with the command sent from Arduino to the signal pin of the Relay. Thus, the Led Bulb connected to the relay will be controlled. Making Circuit Connections: 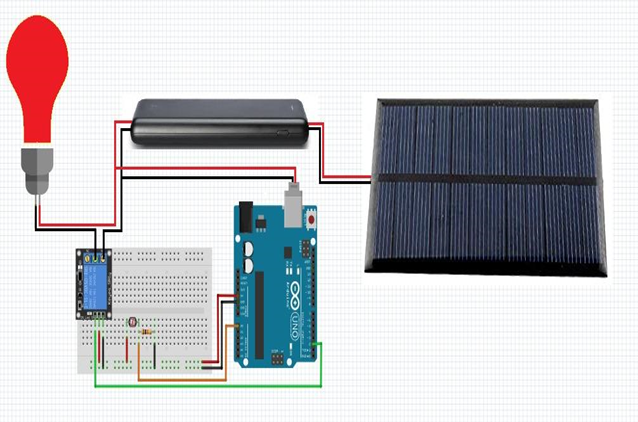 Firstly, the circuit will be designed as mentioned above. 1. The cable coming from the solar panel will feed the Powerbank via micro USB.2. The normal USB outputs of Powerbank will be connected with Arduino and the energy required for the operation of Arduino will be given.3. Also, the red cable we show above from the USB outputs of Powerbank will be sent to the Vcc end of the led bulb, and the cable we show in black will be sent to the NO pin of the relay.4. The black cable coming out of the C pin of the relay will be sent to the GND input of the Led Bulb.5. The energy required for the relay will come to the Vcc end of the Relay with a red cable from the Vcc pin of the Arduino.6. Again, for the energy requirement of the relay, the GND pin of the Relay will come from the GND pin of the Arduino with a black cable.7. To control the relay, the green signal will be connected to the SIGNAL end of the relay from the digital control pin number 2 of Arduino.8. 5v will be sent to one end of the photoresist with the red cable from the Vcc end of the Arduino to measure the light intensity. The other end will be connected to the Analog A0 end of the Arduino by brown cable.9. Here, pull-down resistors are connected to prevent noise. One end of this resistor is connected to the end of the photoresist going to Arduino and the other end to the GND end of the Arduino Coding: The application we will use for coding is the Mblock program. This application is a tool that allows us to do robotic coding by dragging and dropping blocks without the need for programming language knowledge. Coding block is below. 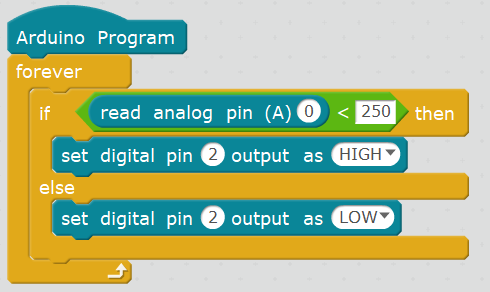 If we explain the application steps one by one: Read analog pin (A0) Block:Indicates that data from the A0 Analog pin of Arduino is read. ( ) < ( ) compare block: This block compares the magnitude of the two values given in parentheses. If the value in the first parenthesis is greater than from the second it gives “True” or 1, if it’s not greater, it gives “False” or 0.  In this project, it was compared that whether the value read in the Arduino’s Analog A0 pin that is, taken from the photoresist is less than 250. This block provides sending the value “False” or ‘0’ from Arduino to the pin number given in parentheses. It provides sending commands to SIGNAL pin of Relay from pin 2 of Arduino so Led Bulb circuit is turned off and the LED is lit. Set digital pin () output as “low“ block This block provides sending the value “true” or ‘1’ from Arduino to the pin number given in parentheses. It provides sending commands to SIGNAL pin of Relay from pin 2 of Arduino so Led Bulb circuit is turned on and the LED doesn’t light. If () then block: With this block, if the condition next to the run is met, it runs the code blocks in the first range, if it cannot be provided, it allows to run the other range. 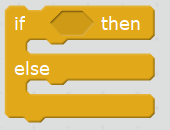 Repeat Block As long as Arduino is open, it ensures its repetition continuously. So from the photosensor the incoming data is constantly conditioned and it is decided that the led bulb is lit or not to be lit. 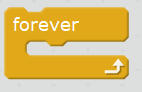 The block when Arduino Uno starts: This block represents energizing the Arduino Robotic Coding device. It means that code blocks added as a chain will be executed when energized and started to run.  ● Since “repeat block” has been added as a chain to the block “When Arduino Uno starts”, it will be entered into this block first.● First of all, data from A0 Analog pin of Arduino will be read inside the repeat block.● From this read data, the light intensity of the environment will be determined between 0 and 1024.● As the condition of the environment is dark, this data will be compared with 250 since this data must be less than 250.● If this comparison is less than 250, blocks in the first range will be run. This means that the digital pin 2 of Arduino will be assigned a value of 1. Assigning a value of 1 means that the relay is turned on, so the electric circuit to which the led bulb is connected is closed. Thus, the circuit will close and the led bulb will turn on.● If this result is greater than 250, blocks in the second range will be run. In other words, the digital pin 2 of Arduino will be assigned a value of 0. Setting a value of 0 means that the relay is closed, so the electric circuit to which the led bulb is connected is opened. Thus, the circuit will open and the led bulb will turn off.● With the repeat block, this condition will be questioned continuously, and the led bulb will be turned on or off depending on the situation. “Non-Renewable and Renewable” concepts used in the classification of energy resources; it is a situation arising from the relationship between the rate of reconstruction and consumption of resources. Renewable energy sources are defined by the ability to renew itself equally to the energy received from the energy source or more quickly than the depletion rate of the source. Non-renewable energy sources can be used once and are depleted. While fossil resources and nuclear energy are non-renewable energy sources; solar energy, wind energy, geothermal energy, hydraulic energy, biomass energy and hydrogen energy are renewable energy sources.Non-renewable energy sources are not permanent sources, they will eventually run out one day. They cause environmental problems: With their sulfuric, nitrogenous and carbonic compounds, they release substances such as CO, CO2, NOx and SOx when these energy sources are burned. Besides when they are processed; they liberate environmentally polluting wastes such as ash, slag, radioactive waste.Renewable Energy is the energy obtained from the energy flow that exists in natural processes that are constantly going on. Most generally, renewable energy source is defined by the ability to renew itself equally to the energy received from the energy source or more quickly than the depletion rate of the source. For example, a technology powered by solar energy consumes this energy, but the energy consumed remains very small compared with total solar energy. The most common form of renewable energy comes from the sun. Some forms store solar energy and wind power. Renewable energy; it is not possible to consume it permanently by plants, animals and people. It faces the danger of complete exhaustion in the near future as a result of the use of fossil fuels by abuse.After the activities and the information given, the students check the answers they put in the boxes during the discovery phase and correct their mistakes, if any. | 25+25 min |
| 5. Evaluation | Materials Used:4 bottle caps (2 large, 2 small), utility knife, silicone gun, DC motor, transparent thick plastic, connecting cable, pipette, batteryMaterials that are not mandatory to use: You can use 5 different materials you want.Knowledge Based Life Problem Aunt Naciye, who has lots of fruit trees in her garden, goes to her garden every day to water her fruits and take care of her garden. Aunt Naciye makes her living by selling the products she obtained from her garden. Aunt Naciye is a very knowledgeable and well-equipped person. This feature is known by the whole district. One day, university students come to the district to conduct a research and investigate who is the most environmentally sensitive person in the district and reach Aunt Naciye. They ask Aunt Naciye about her homework. One of the questions they asked the Aunt Naciye is the question of what consumes the most electricity in the garden. Aunt Naciye answered this question as ‘the water engine’. Because she uses a water engine to carry water passing through the channel to her garden. And this engine is connected to the drip water system. This engine uses the most electricity. Students have suggested a project that they had prepared before and suggested solar panels to Aunt Naciye. But this is not enough for Aunt Naciye. Aunt Naciye wants a recycled water engine. She asks students to help with this. Point1- Gathering information and data using different sources of information (10 points)2- Putting the information together (10 points)3- Does the designed product work? (10 points)4- Is the subject compatible with the slogan? (10 points)5- Is the designed product suitable for size limitations? (10 points)6- Relevance and association of the resulting product with the subject (20 points)7- Problem solving skill (15 points)8- Was the problem solved associated with everyday life? (15 points)1. Design a water engine for Aunt Naciye’s recycling water motor request.2. Investigate with which energy sources the types of water engines work and consider their suitability for green environmental planning.Limitations:You should draw the design you dreamed of on A4 paper.The water engine you designed should definitely work.The water engine you designed should be designed to fit a minimum of A5 paper and a maximum of A4 paper.You must give a brand name to the water engine you create.The water engine you created must have a motto. Evaluation of the Product Created: Points 1-Gathering information and data using different sources of information (10 points) 2-Putting the information together (10 points) 3-Does the designed product work? (10 points) 4-Relevance and association of the resulting product with the subject (20 points) 5-Is the designed product suitable for size limitations? (10 points) 6-Relevance and association of the resulting product with the subject (20 points) 7-Problem solving skill (15 points) 8-Was the problem solved associated with everyday life? (15 points) | 15 min |
| X min |
Assessment
Describe here the assessment method of the lesson, if any. For example, if you plan on assessing your students with a quiz, include here questions and answer options with color-coding the correct answers.